Whether you are staying inside or you are out enjoying the sunshine, the use of a light reflector can make a good photo great for when it comes time to scrapbook or make a Studio J Layout! Great photos can make your scrapbook pages and Studio J Layouts shine!
Here are a few simple tips on making and using a light reflector in your photography.
Here are a few images to compare.
The first image was taken without a reflector, casting harsh shadows on the face.
In the second shot, I positioned a reflector in front of my subject (towards the incoming light), bouncing the light and brightening the face.
Create Your Own Reflector
Light reflectors are available to purchase at local photography stores.
Or you can make your own in a few simple steps using foil and cardboard.
Here’s how:
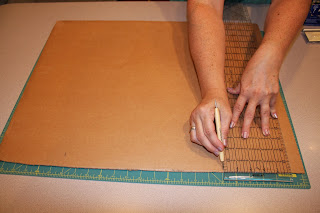
1. Cut cardboard piece to desired size and score in thirds.
2. Wrap foil around cardboard, and smooth out wrinkles.
3. Secure foil in place using tape.
4. Use the finished reflector to bounce light
Additional Reflector Options
There are other tricks to the trade when it comes to bouncing and reflecting light.
Here are a few ideas to try:
Wear White: Reflecting light can be as simple as throwing on a white shirt. Light bounces off of white and will naturally reflect on your subject it you aren’t a great distance away.
Use White Foam Board: Foam core boards are available at local craft stores and are a great reflector option. Plus, they are lightweight and inexpensive, making them a nice photo-equipment option


No comments:
Post a Comment