Tuesday, December 2, 2014

Simply Inspired Blog Hop: Seasonal Expressions

Welcome to the Simply Inspired Blog Hop featuring new offerings from the Seasonal Expressions Idea Book!  If you arrived here from Karen Pedersen's blog, your are in the right place.  If you get lost along the way, click here for a complete list of the participants.  Enjoy the journey--you're sure get some great inspiration for your own projects.

One of my favorite new products featured in the Seasonal Expressions is the Picture My Life Heartstrings cards.  You can now purchase the cards A la Carte.  You get a smaller portion of cards and you don't have to purchase the Memory Protectors if you don't need them.  The Picture My Life cards are not just for scrapbooking--they are perfect for cardmaking as well!  


Here are just four example of cards that you could make, but I still have 
lots of PML cards left--I should be able to easily make at least 
10 cards from one package! 


I combined portions of three different Picture My Life Cards 
to make this adorable "True Love" card.  I love the new 
glittery heart Puffie Stickers!


There are so many many great paper designs, like this cute 
polka-dot pattern and I love the swirls on the top of the card!

 
 You can add in coordinating Background and Texture 
paper to complete your card designs.

 Use plenty of coordinating cardstock to mat your design elements.

Products used:

Now, hop on over to Brenda Rose's blog to see her fabulous creations!

Saturday, November 29, 2014

Cyber Monday Only: 20% Off All Cricut® Collections!

For the first time ever, Close To My Heart is offering a Cyber Monday Sale on Monday, December 1, 2014. There has never been a better time to buy Close To My Heart’s exclusive Cricut® Collections for 20% off the retail price. Whether you love scrapbooking, cardmaking, or creating 3-D projects, our four exclusive Cricut® collections make the perfect addition to any craft room! Sale starts at midnight (MST) on December 1 and ends at 11:59 pm Monday night. Make sure you share the news about this sale with all your customers, friends, and family members, too!  Order on my website www.diana.ctmh.com.  Choose from any of our four collections:  Artfully Sent, Artbooking, Artiste and Art Philosophy.


Monday, October 6, 2014

Simply Inspired Blog Hop: Artfully Sent


If you came here from Lisa's blog, you are in the right place.  If you get lost along the way, you can click here to get a complete list of participants.

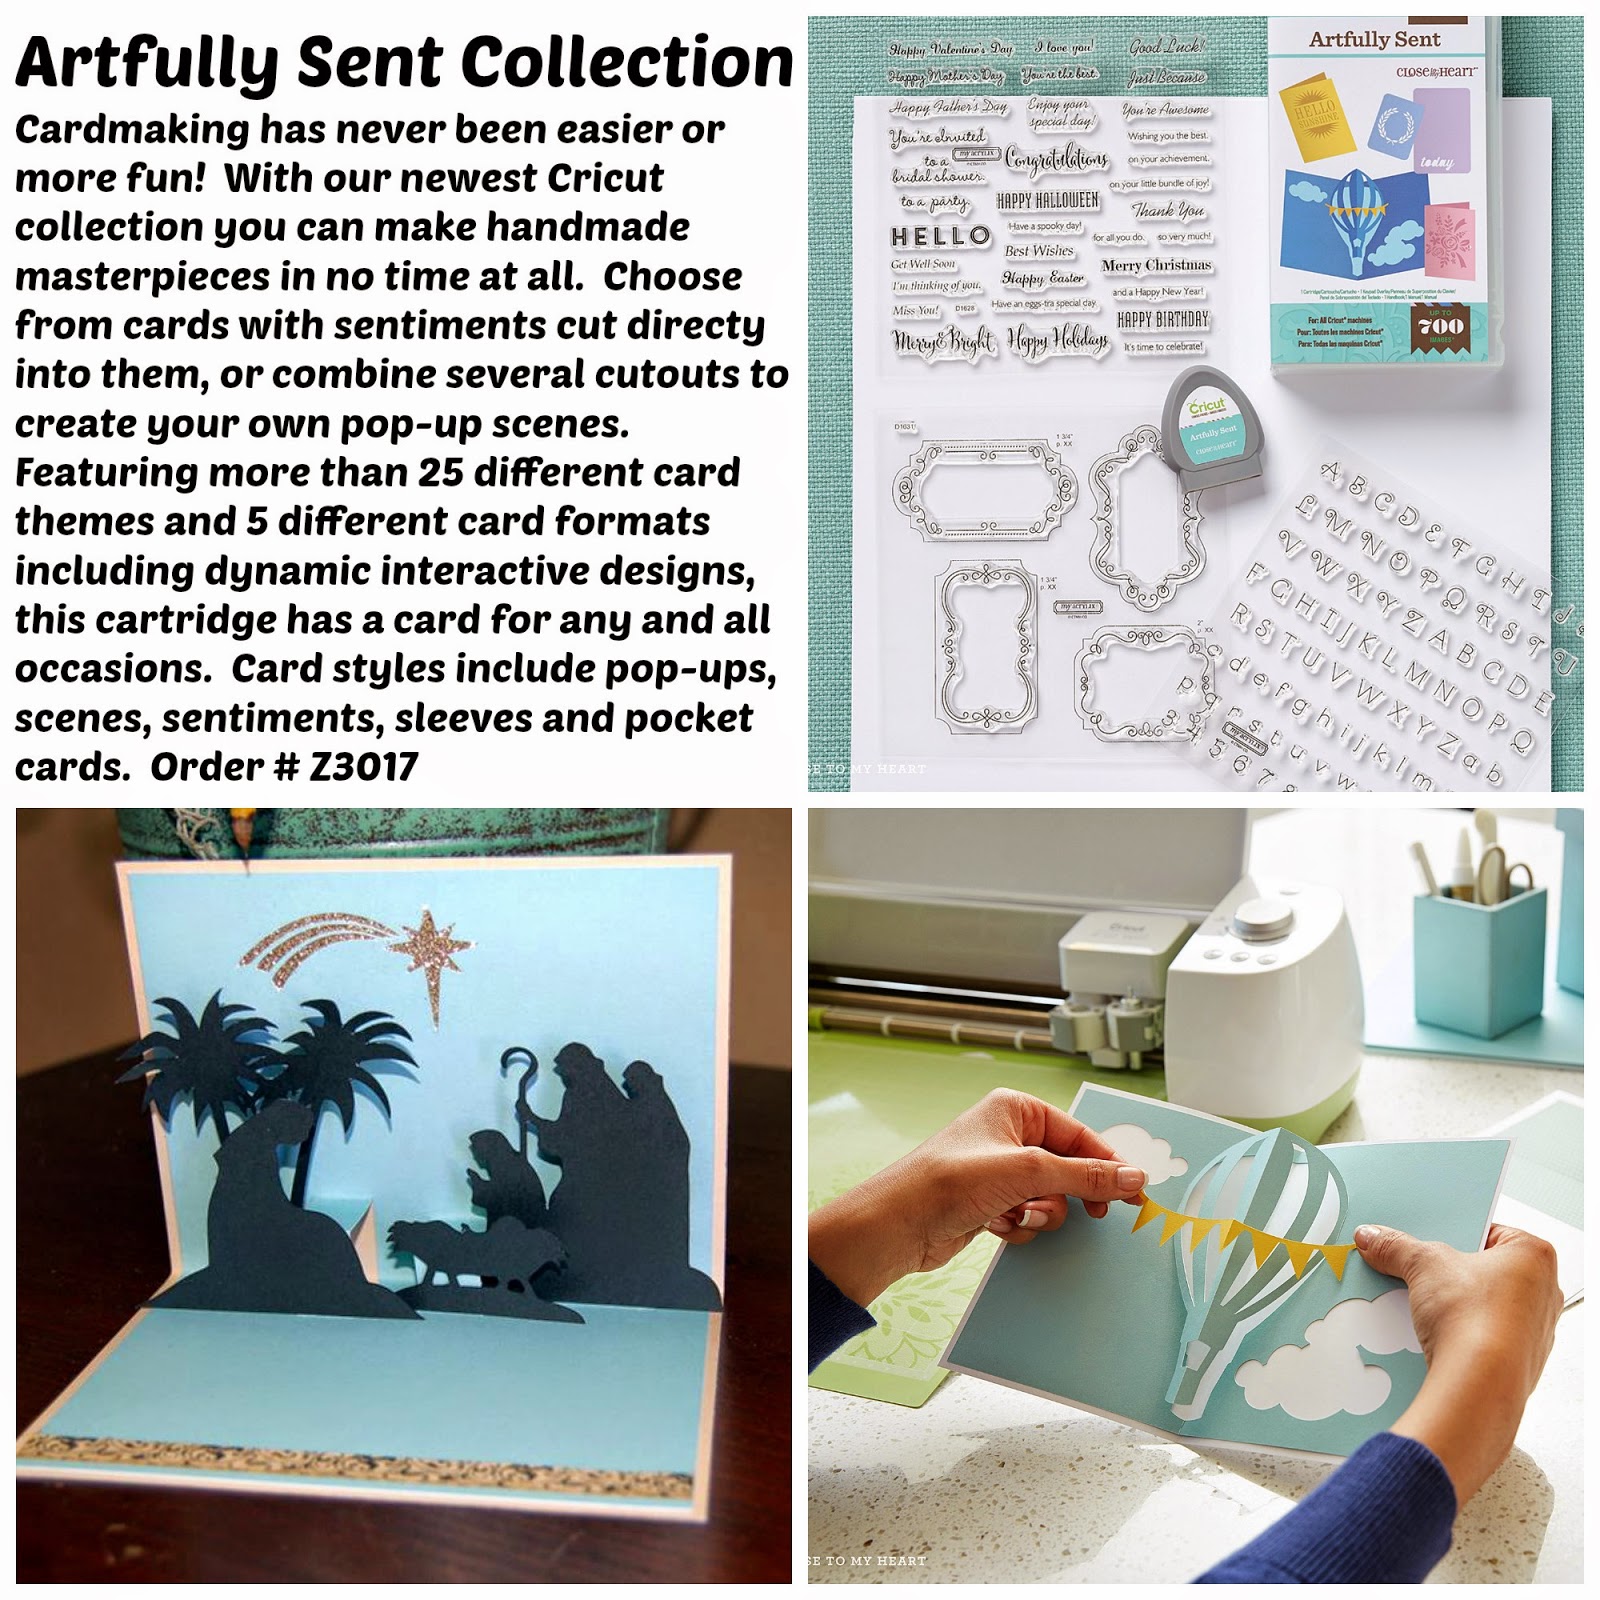
It's finally here!  Artfully Sent--a fabulous new Cricut cartridge especially for cardmakers!  I loved this nativity silhouette card on the cartridge and love how it turned out!  It it sure to bring the spirit of Christmas.


Now head on over to Karen's blog to see her beautiful creation.

Thursday, September 11, 2014

Tuesday, September 2, 2014

September Creative Class

The new "Chalk It Up" paper packet is among my favorites in the new Close To My Heart Idea Book because of its versatility.  Although the paper is somewhat school themed, it can be used for nearly any type of project.  The kit is only $24 and include pre-cut papers, Chalk It Up sticker embellishments and Cricut cuts.  You just need to bring the adhesives that you will need to assemble them.  Attend a scheduled class, or order a Kit-To-Go.  


To order a kit(s), you may either send me a check or pay securely online with a credit card or your PayPal account by using the PayPal “Add to Cart” buttons below.   

Chalk It Up Page and Card Kit - Local Pick up


Chalk It Up Page and Card Kit - Shipped ($7 will be added for shipping) 

Monday, September 1, 2014

Simply Inspired Blog Hop: 30 Years of Happy


 Welcome!  If you hopped over from Lynn Como's blog, you are in the right place.  If you get lost along the way, you can find a complete list of participants here.

As I looked at this stamp set and tried to envision how I wanted to use it, I realized that the cute, up-lifting sentiments would be perfect for a little "Lunch Box Love".  How fun would it be to include a tiny card in your child's or spouse's lunch each day with a few loving words of praise or gratitude?  With that in mind, I created some very simple cards with scraps that I had on hand.

  
Use any papers that you have on hand and cut them according to the dimensions listed above.  Make a bunch of them while you are at it so that you have plenty on hand.


First of all, I made a "puddle pad" using a folded baby wipe and my Cotton Candy and Lagoon Re-inkers. You may need to experiment a bit with colors to see which ones will work well together--some tend to get very muddy looking, but these colors stayed nice and bright.  I placed the baby wipe on one of my larger stamp blocks and squirted the ink in little puddles of color.  Give it a minute to absorb and blend together, then you are ready to stamp.  


Here are a few of the tiny cards that I created--nearly every stamp in the set would lend it self to this project.  I even cut some envelopes out of a sheet of computer paper using the Art Philosophy cartridge.

Thank you for stopping by--you will find more creative ideas when you hop over to Blythe Shupe's blog.


Wednesday, August 13, 2014

August Stamp of the Month

This adorable owl stamp set is a must-have!  Don't miss out on your chance to purchase this exclusive stamp set, What a Hoot, that is available only in the month of August.  You can purchase it for only $5 with a $50 order.  I love the addition of the googly eyes on the card that was made by my friend Angie.  I think the Chalk it Up paper is one of my favorite in the new Inspirations Idea Book.


Friday, August 1, 2014

Free Page Protectors in August!

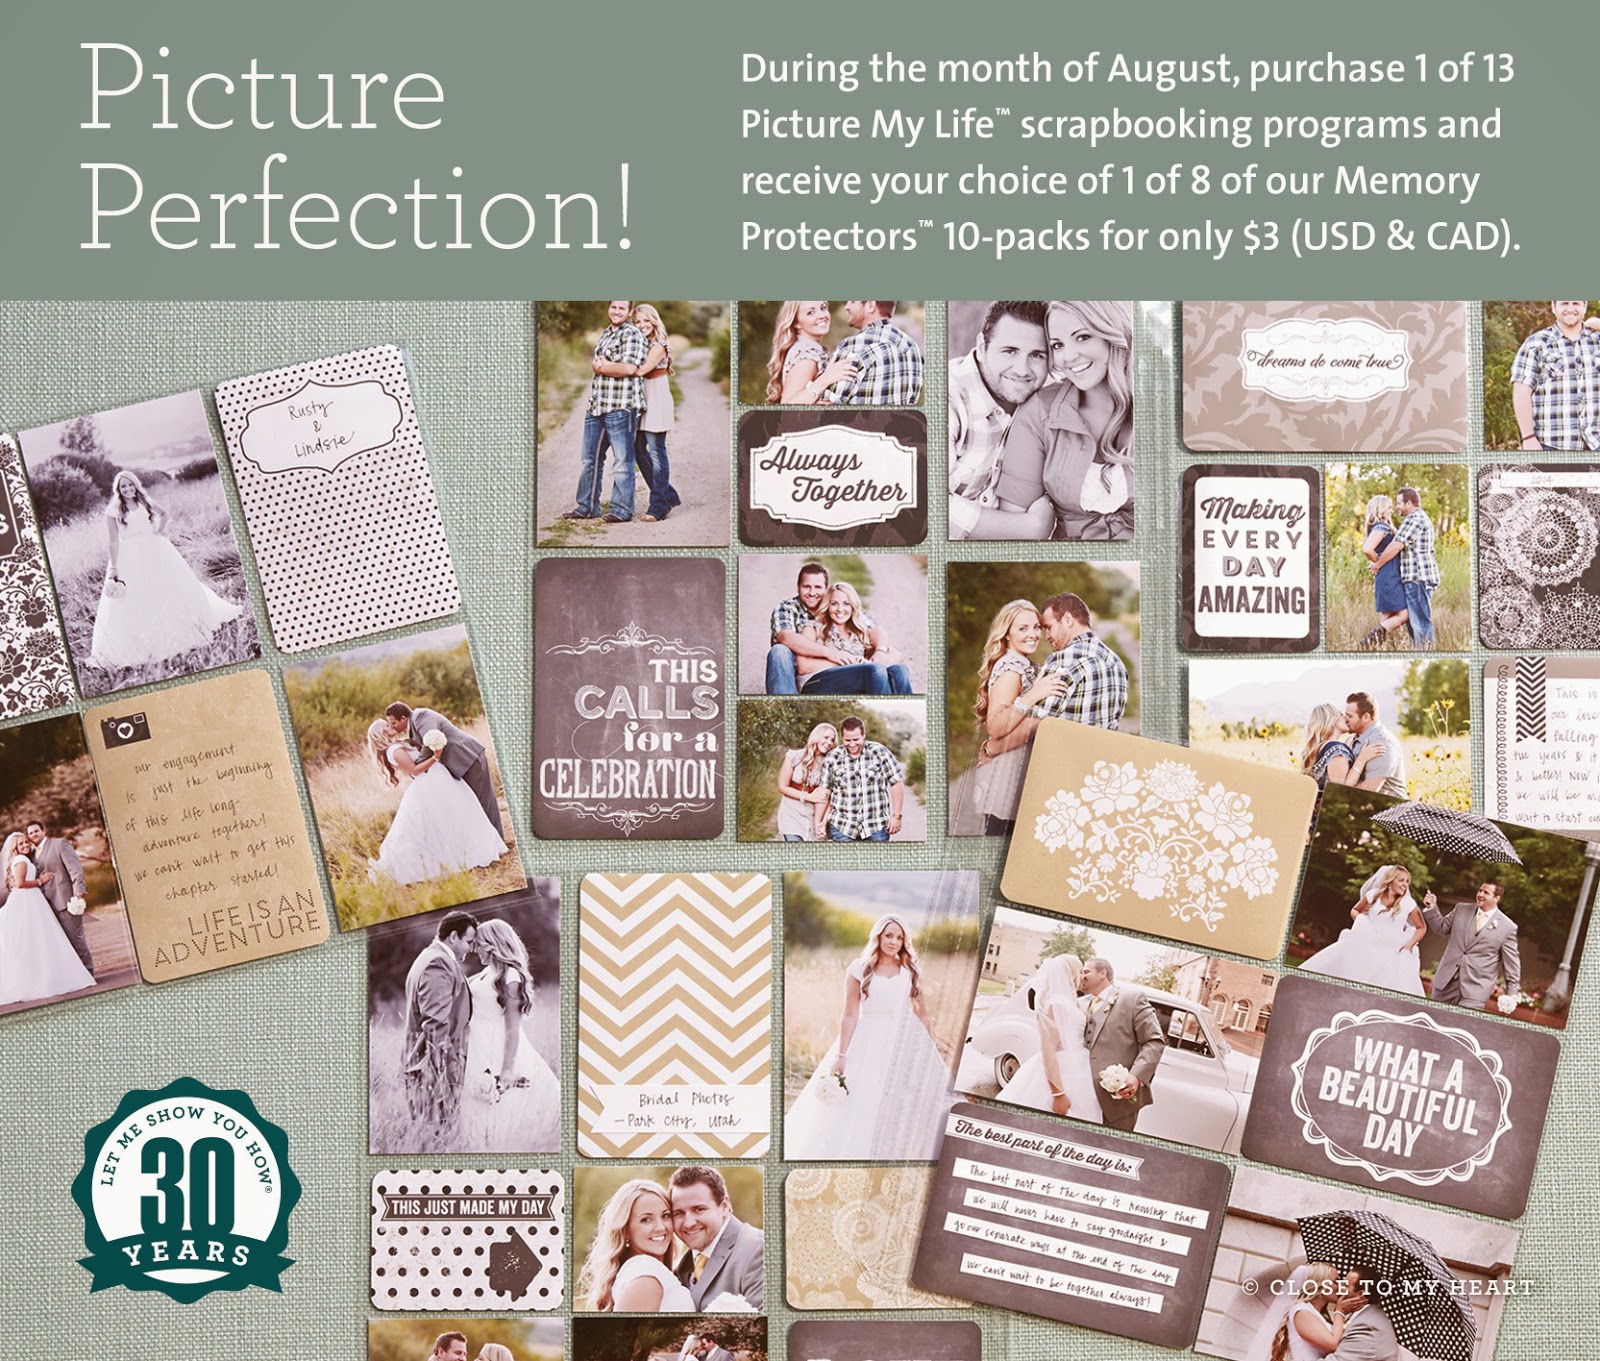
During the month of August when you purchase any of the 13 available Picture My Life Scrapbooking Programs featured in the annual Inspirations Idea Book at their full retail price of $24.95, you are eligible to add your choice of 1 of 8 Memory Protectors 10-packs for just $3.  Each Picture My Life Scrapbooking program already includes a 10-pack of Memory Protectors, so when you add your additional 10-pack for only $3 you will be well on your way to a picture perfect pocket scrapbooking adventure!


Wednesday, July 30, 2014

Simply Inspired New Product Showcase

If you are coming from Debbie Fournier's blog, you are have come to the right place. If you get lost along the way, click here to see a complete list of participants.
It was easy to decide what my project should be this month.  I have eight wedding receptions to attend in the next two weeks and I need wedding cards!  I chose to do a set of three 3x3" cards that fit into a small box.  I hope that you enjoy them!


Now hop on over to Krista Hershberger's blog and see what she has for you!

Tuesday, July 8, 2014

July Creative Class

You will love the colorful and festive Jubilee pages for July.  They are only $22 and will be perfect to showcase your summer photos.  Contact me today to reserve your spot or to order a "Kit-To-Go".

Classes will be held:
Tuesday, July 15, 10:00 am & 7:00 pm
Wednesday, July 16, 12:30 & 7:00 pm  


Wednesday, June 4, 2014

June Creative Class

June's kit featuresTimberline paper and is perfect for your outdoor photos!  These pages are only $22 and will go together quickly since we will be using the matching My Stickease artwork.  There is room for lots of photos, plus plenty of journaling space.  Remember to bring your pages from last month completed with photos and journaling so you can choose a prize out of my product basket!  Please bring your own adhesive, glue dots and 3-D foam tape to class. Contact me today to order your kit.

Tuesday, June 17, 10:00 am & 7:00 pm
Wednesday, June 18, 12:30 & 7:00 pm


Saturday, May 3, 2014

Simply Inspired CTMH Blog Hop: Free To Be Me

If you came here from Katy Taylor's blog, you are headed in the right direction.  If you get lost along the way, click here from a complete list of participants.

Celebrate National Scrapbooking Month by creating something beautiful with the exclusive "Free To Be Me" paper packet.  It is yours for only $5 with a qualifying $50 order.  I love the bright, bold patterns of the papers and the vellum papers are a super fun addition!

I chose to make four card designs with my paper--and there is plenty of paper left over to make more cards or another project of your choice.  All four of the card designs came from our great to How-To Books, Make It from Your Heart Volumes 1 & 2.


Now, you are ready to move on and see what Lynn Como has for you. 


Thursday, April 17, 2014

May Creative Classes

You will have two kits to choose from in May because there are seven new paper packets in the Idea Book and I couldn't bear leaving one out--so you can choose either one of them, or do both if you can't decide between them!

The Balloon Ride kit features soft colors and elegant paper designs and a pop of sparkle.  These pages will be a breeze to put together since they incorporate the Dimensional Elements Complements which feature whimsical images.  Two of the cards use hot-air balloons cut out from the paper.  This kit is $23 and includes pre-cut papers, Embellishments, Cricut cuts, four cards with envelopes, use of my stamps and inks and personal instruction.  You can also order a Kit-To-Go if you can't make it to class.  You can stop by and pick it up, or for an additional charge, I can mail it out to you.


The second kit that you can choose from is Ivy Lane.  This kit features rich colors and elegant paper designs.  The beautiful Cricut cut flourishes add an extra touch of class.  This kit is $22 and includes pre-cut papers, Cricut cuts, embellishments, four cards and envelopes, use of my stamps and inks and personal instruction.  You can also order an Ivy Lane Kit-To-Go.


All classes are held in my Draper workshop.  Please bring your own adhesive, glue dots, 3-D foam tape and other basic tools.  Contact me today to order your kits.  All kits are pre-paid.

Tuesday, May 13, 10:00 am & 7:00 pm
Wednesday, May 14, 12:30 & 7:00 pm

Thursday, April 3, 2014

Simply Inspirted Skylark Collection Blog Hop


Doesn't this card just shout spring?  I love the addition of the Sorbet Cardstock to the Skylark papers--it just brightens everything up and sets off the patterns of the B&T paper so well.

I focused on paper piecing for this card and the layered flowers are so adorable.  I love the little M-sized stamps and this particular one is my favorite!  At only $2.95, they are such a bargain.  Of course, I had to add some texture by using a couple of our new embossing folders.


Monday, March 31, 2014

April Creative Class

Our Creative Class for April features some bright, cheery pages featuring the Lollydoodle paper packet.  This kit is $22 and includes pre-cut papers, Cricut cuts, embellishments, use of my stamps and inks and personal instruction.  You can also order a Kit-to-Go.  Classes will be held in my Draper workshop:

Tuesday, April 8, 10:00 am & 7:00 pm
Wednesday, April 9, 12:30 & 7:00 pm
I may add another class on Tuesday, April 15--stay tuned for details.

Contact me today to order your kit.

Also, time is running out to sign up for our upcoming ArtisticU Scrapbooking Retreat.  It will be held on Thursday, April 24th thru Saturday, April 26th.  Join us for some great projects, home-cooked meals, games and fun activities and well as plenty of relaxation.  Visit our website www.ArtisticU.net for more information.


Monday, March 3, 2014

Spring 2014 Artistic U Scrapbook Retreat


We still have a few spots available for our upcoming Artistic U Scrapbook Retreat.  We will be staying at the beautiful Silver Springs Lodge in Heber, Utah which boasts some amazing amenities including:  plenty of work space for scrapbooking, large bedrooms with a private bathroom, large heated pool, hot tub, theater room, kayaking, hiking and beautiful surroundings.  You will enjoy fabulous projects, delicious home-cooked meals, games, fun and lots of relaxation. 

Invite your friends and reserve your spot today!  Click here for a link to our website for more information.  


MARCH CREATIVE CLASS

I love the pages for the March Creative Class!  I think we are all ready for a little bit of Springtime cheerfulness!  The kit for this class is only $21 includes pre-cut papers, embellishments, use of my stamps and ink pads and personal instruction.  If you can't come to class, you can order a Kit-To-Go. 

Tuesday, March 18, 10:00 am & 7:00 pm
Wednesday, March 19, 12:30 am & 7:00 pm

All classes are held in my Draper Studio.  Please bring a basic tool kit including adhesive, glue dots and 3-D adhesives.  
 

Monday, February 17, 2014

EMBOSSING IS BOSS BLOGHOP


Welcome to our Embossing is Boss Blog Hop!  If you have arrived here from Dana's Blog you are on the right path!  If you happen to get lost along the way, you can get the full list of hoppers here.


I am so in love with our new Close To My Heart Embossing Folders!  I created this wedding card using Ariana papers and the Dot Embossing Folder.  We also carry the following designs: Damask, Stripe, Quatrefoil & Damask.  To see them all, click here.  I enjoy finding new techniques to try with our CTMH products, and on this card I tried a technique called Diffused Embossing.  Diffused Embossing allows you to emboss just a portion of your project, leaving a flat space to stamp on.  I created my own diffuser using multiple layers of cardstock.  I used my Cricut Machine and cut out an oval frame that had an opening that would accommodate the message stamp that I wanted to use.  You will cut out enough layers so that when you stack them, they are thick enough to replace one of your acrylic plates that comes with your embossing machine--I used 14 layers for my diffuser.

I used painter's tape to adhere my diffuser to the top of my Embossing Folder.  Open your folder and center your cardstock over the opening, top with your acrylic plate, then run it through your embossing machine.  

 For the frame on the card I used the Silver Geometric Washi Tape.  It is hard to see in the photo of the card, but it gives it gives the frame a nice shimmer.  I found that it is quite easy to create a mitered corner with the Washi Tape.  To see all of the Washi Tape that we carry, click here.


Tear a strip of Washi tape longer than the edge of the frame and adhere it to the frame.  I cut my frame so that it was 1/2" wide and the Washi Tape fits perfectly!  Fold the Washi Tape back on each corner at an angle, so that each point will align with the inside corner and the outside corner of the the frame.  Crease it really well using your fingernail.  Lift the corner of the Washi Tape, and cut along the crease line, then stick it down on the frame and burnish it with your fingernail to make sure that it is well-adhered.  Repeat on all four corners and you will have perfectly mitered corners! 

Products Used:


Now it’s time to Hop on over to Krista's blog to check out her beautiful artwork she has to share with us! 

Friday, February 14, 2014

Stamp of the Month and NEW embossing folders


I adapted this card from one that Melanie Brown had on her blog.  I substituted some cardstock that I embossed with our exclusive new embossing folders.  I lightly sanded the cardstock to make the patterns stand out.  I love how quickly you can and detail and texture to projects by embossing the paper.  I love this months Stamp of the Month, Wild About Love.

You can earn the embossing folders FREE when you purchase our bulk packs of cardstock.  One embossing folder free with every two packages of cardstock that you purchase--while supplies last, so act now!

Sunday, February 9, 2014

SCRAPBOOK USA EXPO CLASSES

We are looking forward to the Scrapbook Expo March 28th and 29th. Sign up for our classes at www.scrapbookusaexpo.com.

Friday & Saturday 12:30


Friday & Saturday 10:30


Friday Only 6:30

Score Big with Embossing

Friday, January 31, 2014

Simply Inspired CTMH New Idea Book Blog Hop

 Welcome to our Simply Inspired CTMH New Idea Book Blog Hop.  If you arrived from Debbi Fournier's blog, you are in the right place.  This blog is like a big circle, so if you get lost, you can find the complete list of participants here.  This month it is "anything goes" and I chose to work with our new Ariana paper packet--my favorite of the seven new kits!  The card I made is quite simple, but I tried a fun new technique to use for the body of the butterfly.  I used  a piece of the green B&T paper from the Ariana kit and our Liquid glass and made a paper bead--so simple!


Here is how you make a paper bead: 


I used some yellow-tipped sewing pins for the antennae on the butterfly.  Just bend them slightly and then put a blog of Beacons 3-in-1 glue on the pins and glue them inside the top of the paper bead.

 Now head over to Carolyn Johnston's blog and see her beautiful artwork.